When the nail art craze first swept the nation, celebrities and beauty addicts alike opted for dramatic looks – the bigger, bolder and embellished the pattern, the better. However, the tide seems to be turning and this season's catwalks saw models storming the runway with nude nails or minimalist designs.
For those not quite ready to abandon the fun of creating nail art, the 'Negative Space Manicure' makes for a sophisticated and stylish alternative to completely polish-free nails.
Scroll below for the full list of tips
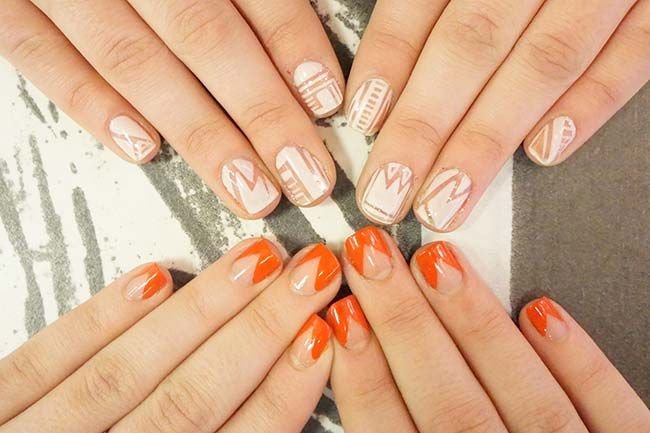
The Negative Space Manicure was a huge trend on the spring 2015 catwalks
This cut-out style of manicure not only incorporates the nude nail trend seen on all the spring 2015 catwalks, but also lets you experiment with different colours and patterns. Whether you're creating a 'v-tip' or you're more nail-art confident and prefer to rock Aztec-patterns and styles, we take a look at the five easy steps to creating this look.
Step 1: It's important to prep your nails, especially if you want your manicure to last. File the nail into your desired shape, then use a nail buffer to gently eliminate any ridges.
Step 2: Start by applying one coat of your base polish to lay a foundation that will ensure stronger, smoother and healthier nails.
Step 3: Apply one coat of your preferred colour, leaving parts of the nail without colour as you create your desired pattern. Try a bold coral shade for a statement nail, or if you're wanting to try the minimalist trend, opt for white polish for a nude and neutral pattern.
Step 4: Repair any mishaps with a nail art corrector pen.
Step 5: Seal the look with one coat of your preferred top coat, for a professional finish.
Click here to see the best celebrity nail art
For more information on how to create the look, head to nailsinc.com